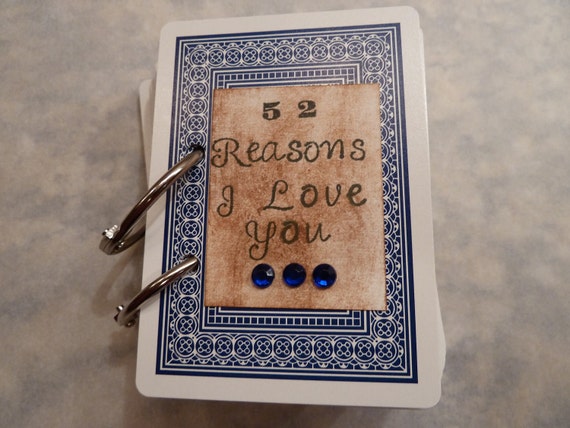
52 Reasons Why I love You
This is a little something that I originally saw on a site, when I was trying to think of something creative to do. A little something to show the man who I love how much I love him. It is so cute and again this also works for the ladies too, If you're a man and want to show a little love to your lady then this is a subtle way that can bring a tear to her eye.

- 52 Reason Why I Love You
Crafts Materials Needed: Including many different pictures
A Deck of Cards
Glue or Paste(tape can even be used)
Jump Rings/Ribbon/String/Zip Ties/Old Necklace/Shoe String/Ect..... any of these are acceptable use you imagination
Paper / Printer (or you can write out by hand)
Hole Puncher
Again you can add so many different things to these cards to personalize them
First get yourself a deck of cards (it looks even better if they are old cards that you already have). You can be creative in so many different ways with these cards. Do it in so many different ways its awesome. I made mine in reflection to the things he loved to do like work on cars and race them. You can make your's any way you want too. I used Zip ties to hold the cards together, you could use pipe cleaners, yarn, shoe strings,ribbon,chain links.old necklaces, old bracelets, ect..the possibilities are limitless go crazy and get personal. I used stickers for mine to do the lettering. You could use, stamps,markers,white out,cut outs,stencils, etc..also the possibilities are limitless as well. This is a way to do it if you want to use the computer and are computer savvy. You can download templates or create your own templates either way you will need 4 of them of the same character make up. I would preferable go plain and then type in the numbers it's easier that way . On the plain templates you will want to enter in the numbers 1-16. On the second template you will want to add the numbers 17-28. On the third you will want to add the numbers 29-40. On the four template add the numbers 41-52. Now with these numbers you can make them any font you desire but do not make them so huge or else they will not fit all on to the template. I went with Font size 24 but you could go a little smaller than that if you like. Keep in mind you want the numbers visible but not so big that they do not fit the cards. Now you can do this two ways you can print out the templates and then write in the words or you can type in the words underneath each typed in number. Here are few examples so that you get an idea of what I am talking about.
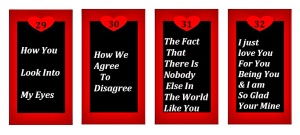
- Example of full typed card

( above are a few different examples of created templates with the numbers and the words typed in ready to be printed) of course you can use any color and or font when making these it does not have to be black and red or brown and pink any kind of colors you want. Once you created it you can then print out the templates and then paste them on the back of each individual card. Easy right, well if you do feel like doing all of that typing then you can go with another option which is to print out all the numbered template with no words on them and then handwrite each individual card in your own handwriting underneath your printed out numbers. Either way it looks great :) below is a picture example of the printed out numbers with no letters typed in and then personally handwriting into each card.

- A template with the number printed out and then later on handwriting in words
You can also opt out of using the computer all together and get really funky creative and handwrite everything. One example would be to use post its. Another example would be to use white out and then write in the numbers and words either way it comes out looking awesome. Below are a few picture example of the hand writing numbers and words concept. Again use you imagination the possibilities are endless.
- Another example using post its
- Hand written
- Example of using plain white paper such as computer paper

- Get creative
You get the picture so to speak :). Many other people also went all out and made the cards into a collage which looks super awesome but very time-consuming. Here are a few photos of the cards in collage form. I really wanted to do this but unfortunately at the time I did not have enough time to do so. If you have the time then by all means get funky with it. Below are some picture examples of the collage cards.
- example of the cards in a collage form

- another example of card collage
- Get funky creative
So once you figure out exactly how you want to do the cards. After you have them numbered and typed/or hand written you will then want to print and cut the paper to fit the inside of the individual cards so that the deck of cards numbers are not covered up and paste them on. If you are just hand writing the cards out then printing and cutting will not apply all you have to do is write on each individual card which cuts out pasting and printing,cutting. If you are doing a collage then you can go all out just do not cover up the numbers that already exist on each of the individual cards this you will need paste and or tape to do its more complex and trickier than the other styles. Once its all done you will need to hole punch each individual card but make sure that the holes line up so that it and be either tied together or do something creative like bracelets, necklaces or the ideas are limitless. Once the cards are together and are numbered from 1-52 its time to complete the deck by doing the front of the very first card before the number 1 card. I used the joker card for that by put 52 reasons why I love you on the colored side of the card and leaving the joker card blank. Again you can add a heart or some type of drawling to that just do not cover up the joker. You do not have to use the joker card for that card, you can use another like the playing instructions card that comes in the pack or one of those cards you don't need to use while playing cards. Once finished with that card Punch a hole or holes depending on of you wanted one or two holes throughout your deck and add it to the top of the deck by that meaning the first card. If you tied the deck you will then need to untie the deck, and then add the 52 reasons card to the rest of your deck then tie it back together. If you used rings do the same, ect. I used that card for last because I used stickers and I just wanted to see what the others looked like together before adding it on top. You do not have to do it the way I did but you can get the gist of how its done. Her are a few more photos before I go. Trust me you Husband/Wife or Girlfriend/Boyfriend will be emotional over these and definitely love the fact that it was made by you one of a kind just like the love you have for each other :)


Please If you decided to do this project please feel free to share with me your ideas and even a picture of how your deck came out by commenting below :)
Till next time friends thanks for reading,
sincerely,
The sleepless Mommie


No comments:
Post a Comment